
Level: Beginner | Offered: Fall 2025 | Time: 2 hours
This workshop is intended to be an introduction to microcontrollers. It may benefit you if you've have prior experience with microcontollers or Arduinos before, but it's not necessary. Having an understanding of microcontrollers is key to any embedded systems engineer.
To complete this workshop, you will need a SunFounder ESP32 Starter Kit. These kits will be provided in person in the workshop for you to build your project on. As much as we would like you to take these kits home with you, they are unfortunately not yours to keep! Please return all parts at the end of this workshop, so we can host this workshop again next year.
Tasks
Task 0: Environment Setup
- Install the Arduino IDE
Follow this short guide and follow the steps to install on your personal device.
Task 1: Install the ESP32 Board Package
To program the ESP32 microcontroller, we first need to install the ESP32 board package in the Arduino IDE. A board package is a collection of software files and configurations that allow the Arduino IDE to recognize and compile code specifically for a given microcontroller or development board.
-
Install the ESP32 Board
- In the Boards Manager window (the second icon from the top on the left side pannel), type ESP32 in the search bar. Click the Install button to start the installation process. This will download and install the ESP32 board package.
-
Connect to the Board
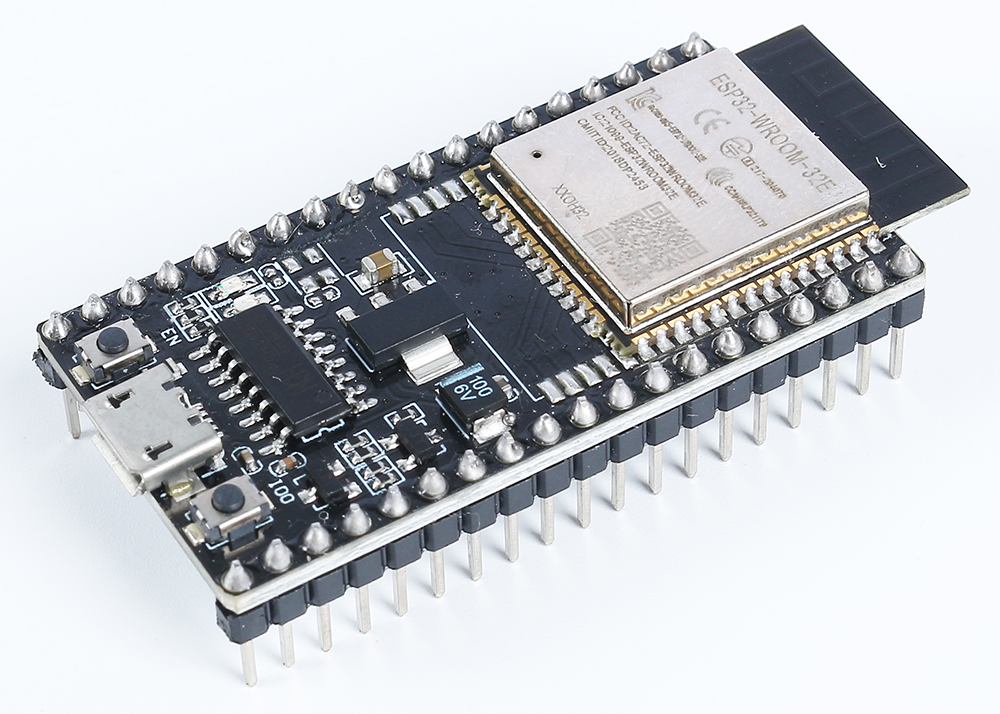
Find the ESP32 microcontroller in your kit
- Connect the ESP32 to your computer via the USB cable provided in your kit. If you do not have a USB Type-A port on your laptop, please see us at the front and we will provide you with a different cable or adapter.
- Navigate to Tools -> Board -> esp32 (the tools tab is in your toolbar), and select ESP32 Dev Module.
- If your ESP32 is connected to your laptop, you can choose the correct port by clicking on Tools -> Port.
- You are now ready to upload code to your board!
Task 2: What Components do I need?
To start our project, we first need to get an idea of the required hardware. We’ll be using four main components in this build: the ESP32 microcontroller, liquid crystal display (LCD), push button, and buzzer. Each of these plays a specific role in making our dino game come to life. Additionally we will need a breadboard, and lots of wires to interconnect all our components together.
1. Microcontroller (ESP32)
Purpose:
The ESP32 will be the “brain” of your project. It'll run the Dino game code, handling the game logic, detecting button presses, updating the display, and generating audio signals.
How it works:
The ESP32 will execute your program instructions continuously, updating the game state (like when the dino jumps or collides with obstacles). It will send signals to the LCD to draw graphics and to the buzzer to produce sounds.
Connections:
- Sends data to the LCD display via I²C communication pins.
- Outputs sound signals through a pulse-width modulation (PWM) pin connected to the buzzer.
- Reads input from the push button through a digital input pin.
2. LCD Display
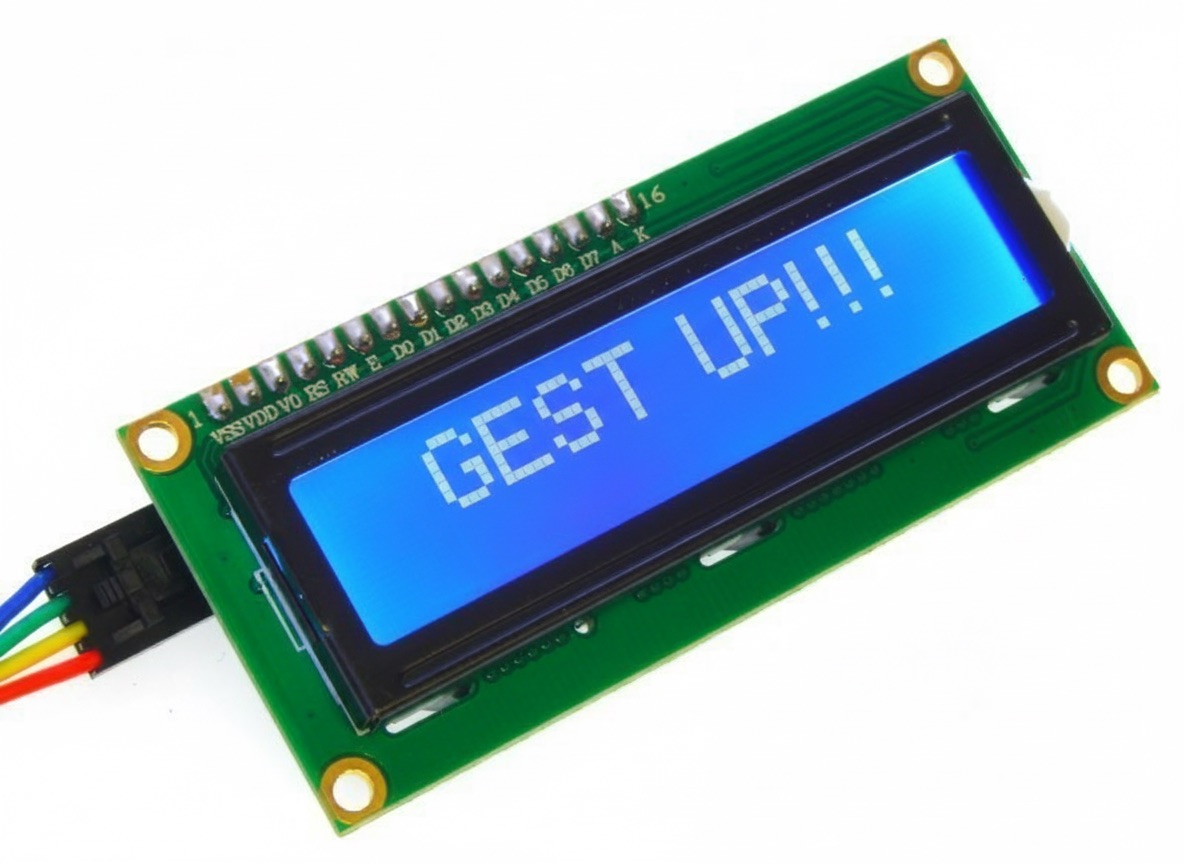
Find the LCD in your kit
Purpose:
The LCD (Liquid Crystal Display) shows the game graphics like the dinosaur, ground, and obstacles, in real time.
How it works:
The ESP32 will send pixel or character data to the LCD over I²C. The LCD refreshes its screen rapidly to show motion, creating the illusion of the dino running and jumping.
Connections:
- Connected to the ESP32’s I²C pins, SDA (serial data) and SCL (serial clock).
- Powered by 5V and GND from the ESP32.
3. Push Button
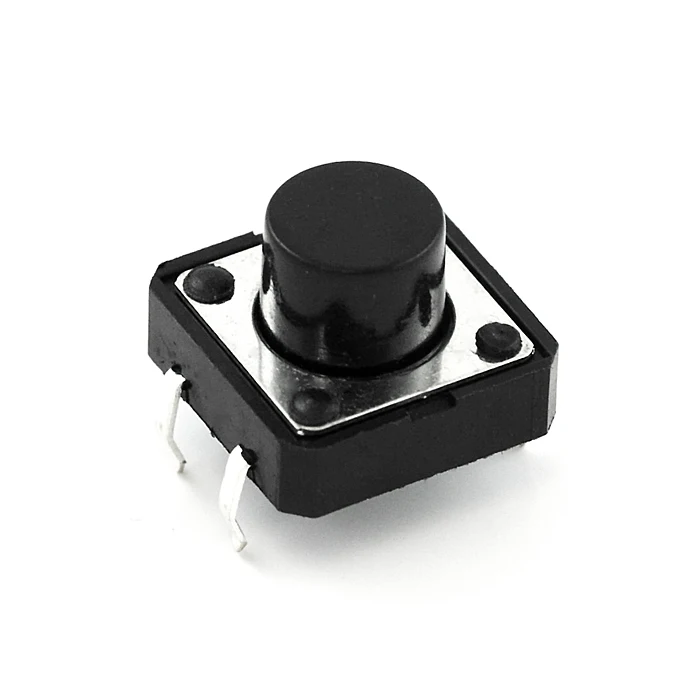
Find the push button in your kit
Purpose: The push button serves as the player’s input, pressing it will make the dinosaur jump.
How it works:
When you press the button, it will close an electrical circuit, sending a digital HIGH or LOW signal to one of the ESP32’s GPIO input pins. Your program will detect this change and update the game state to make the dinosaur jump.
Connections:
- One side will connect to a GPIO input pin on the ESP32.
- The other side will connect to GND.
4. Buzzer
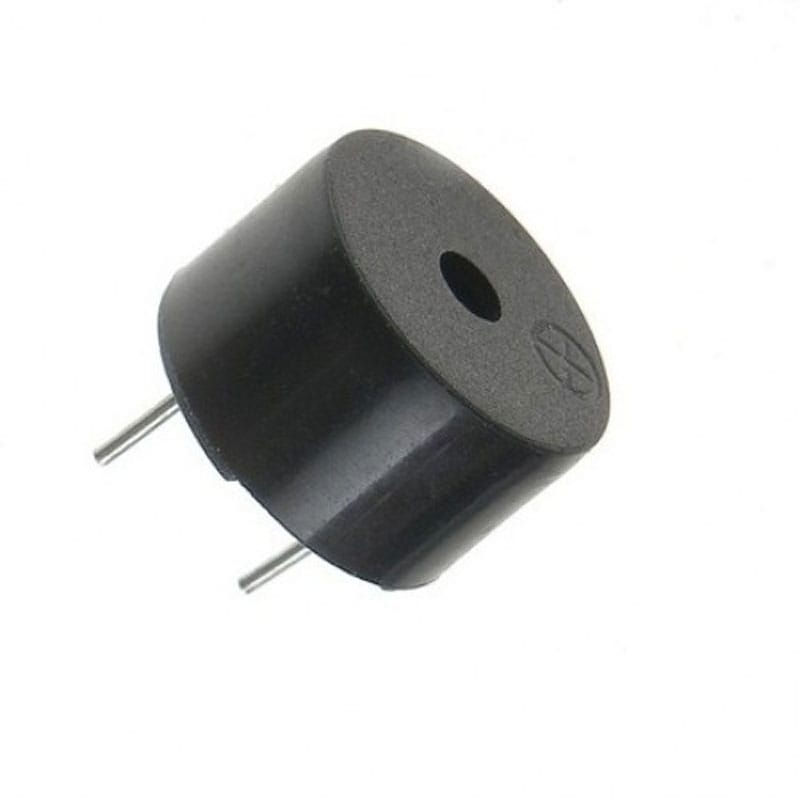
Find the buzzer in your kit
Purpose:
The buzzer will generate sound effects for our game to make it more interactive.
How it works:
The ESP32 sends a pulse-width modulation (PWM) signal to the buzzer. The PWM frequency determines the pitch of the sound you hear.
Connections:
- Connected to PWM output signal as its power source.
- The other side will connect to GND.
5. Breadboard
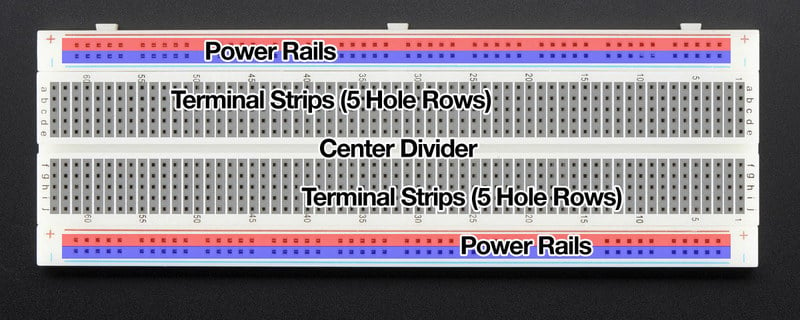
Find the breadboard in your kit
Purpose:
The breadboard allows us to build and test our circuit without soldering. It provides a simple way to connect components together electrically using internal metal strips that run underneath the holes. The breadboard is used to mount the ESP32, button, LCD, and buzzer together. It makes it easy to wire connections between the microcontroller and each component using jumper wires, while keeping the setup neat and easy to modify as you test your dino game.
How it works:
Each group of holes in a row or column are electrically connected. The central gap separates the two sides of the board, which is where you can place integrated circuits or modules. The long rails on the edges (usually marked with red and blue lines) act as power and ground buses, letting you easily distribute power to all your components.
Connections:
- Everything
The schematic for your hardware layout is provided below:
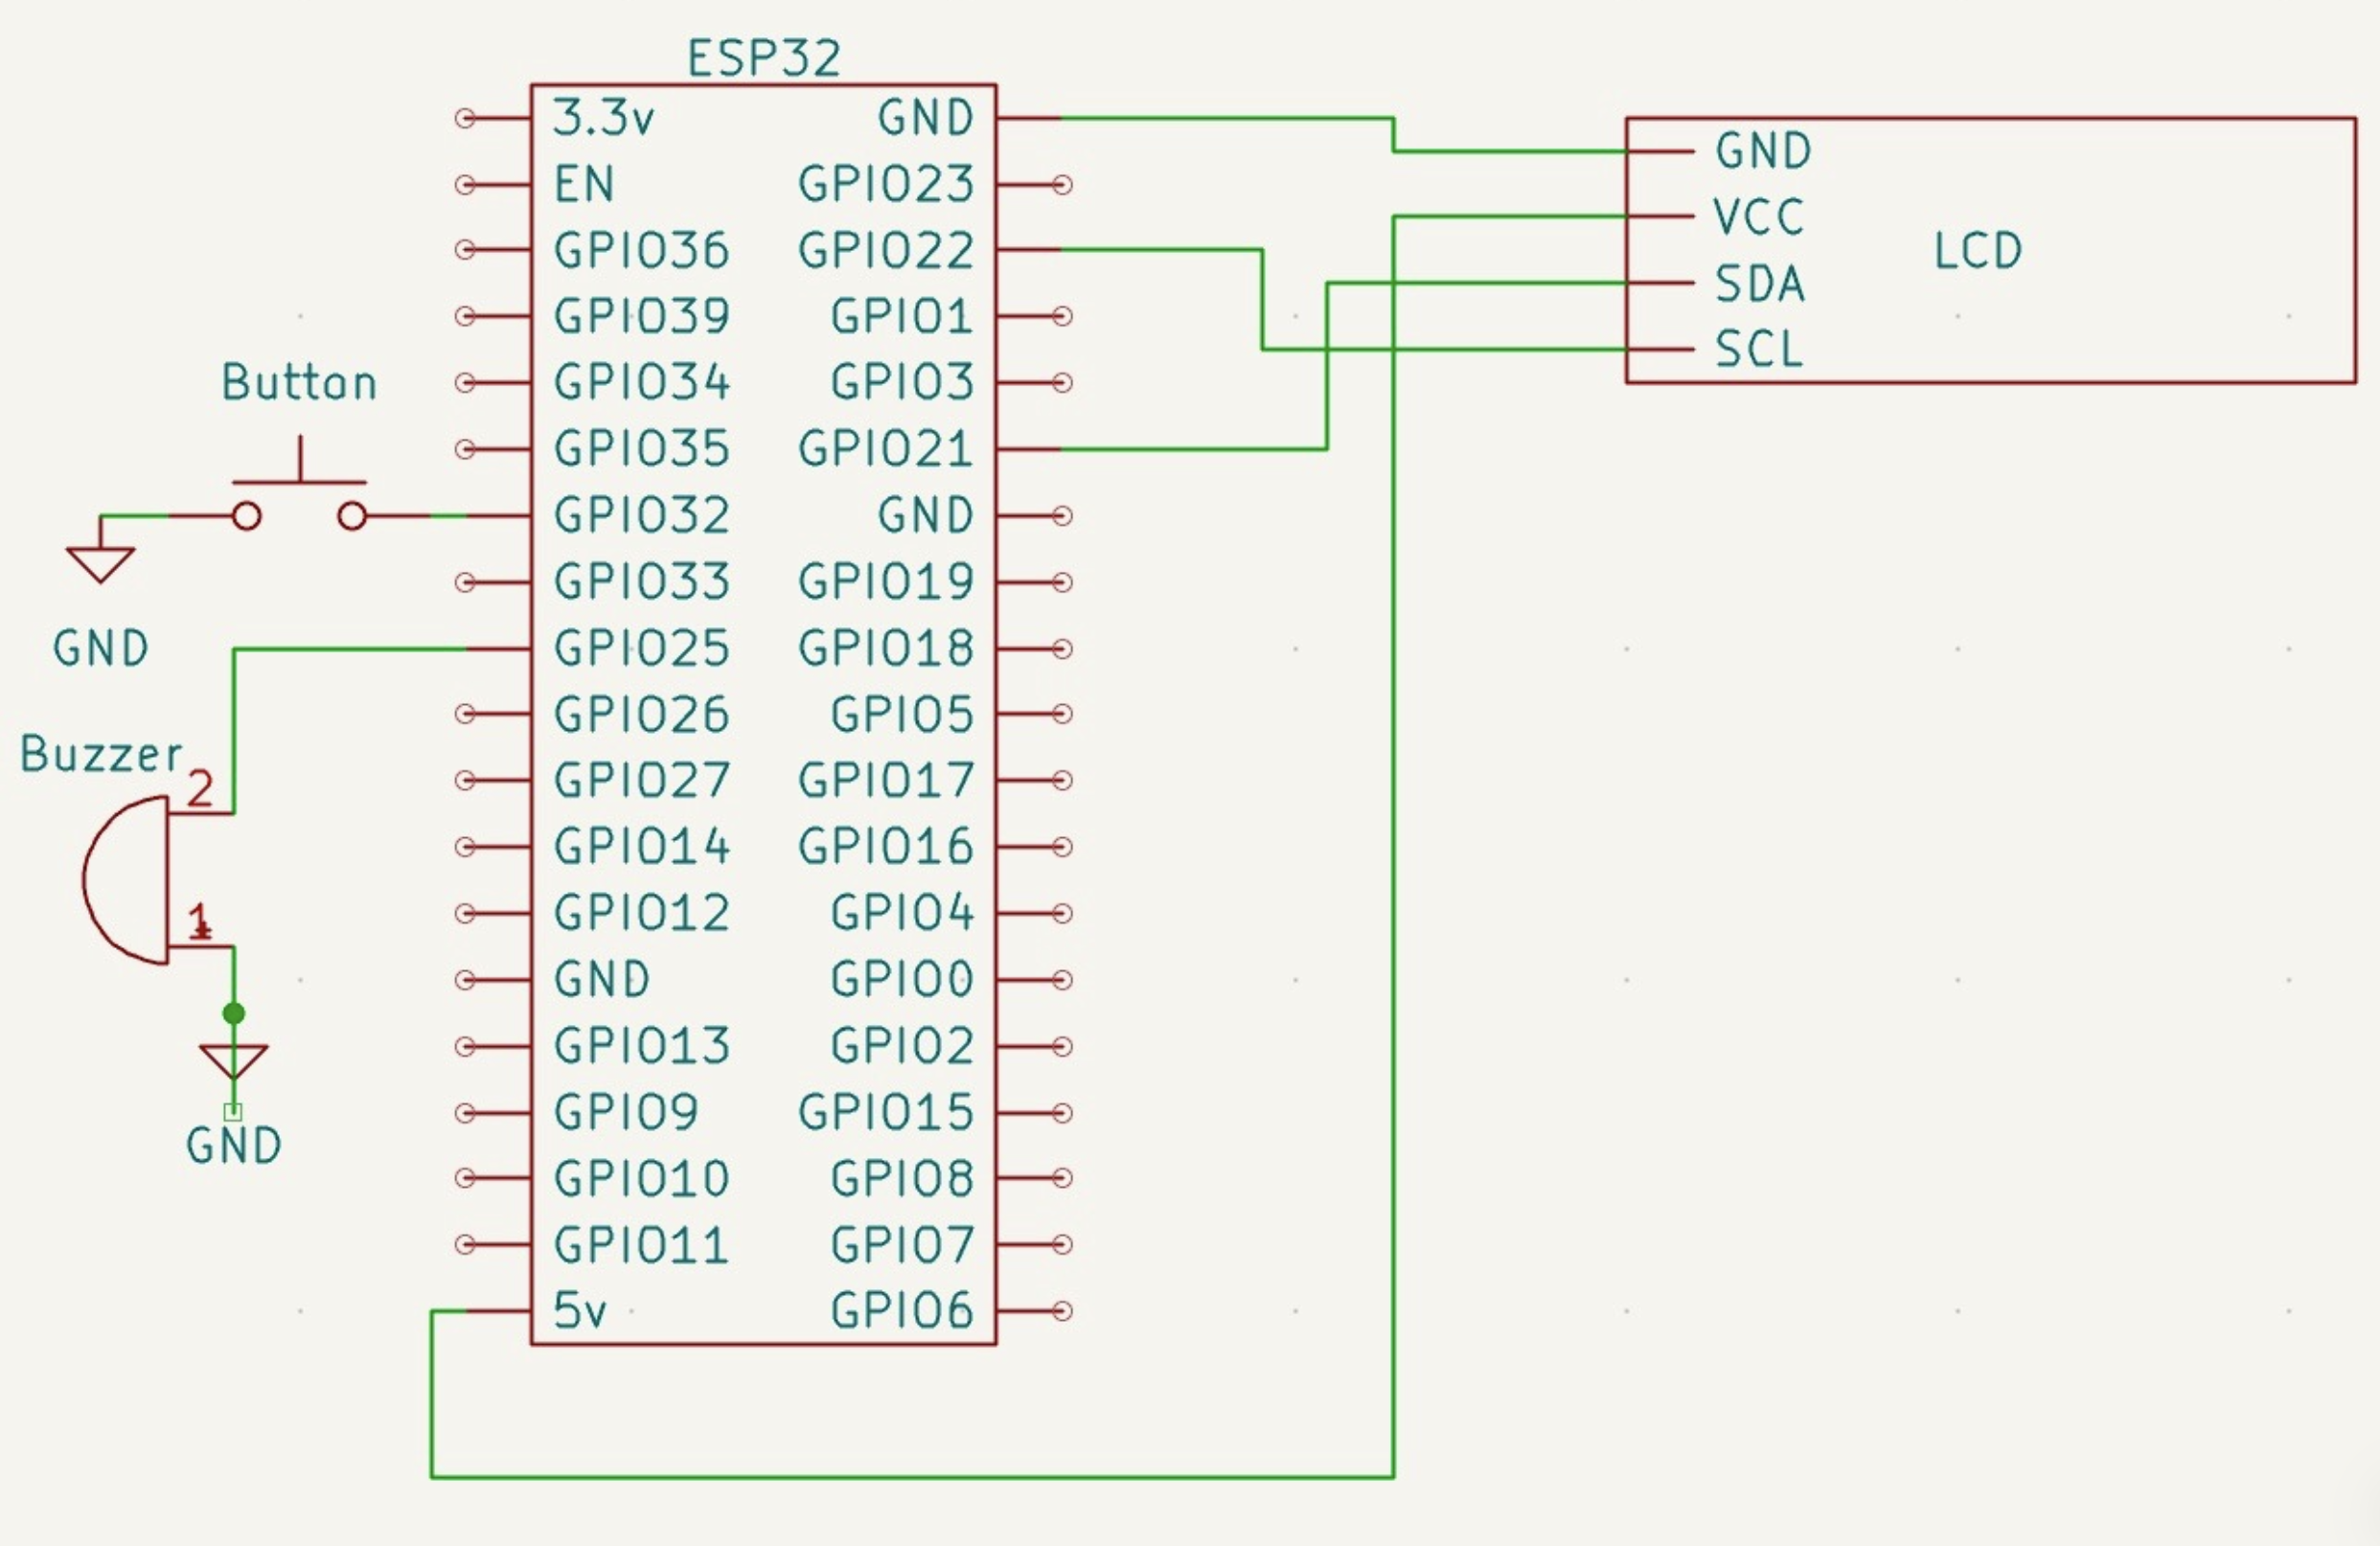
Using this schematic, please wire your breadboard together.
Task 3: Write your Software!
Now that you’ve wired everything up, it’s time to bring your dino to life with code! We’ll be programming the ESP32 to draw frames on the LCD, read input from the button, and play sound effects through the buzzer. To start, create a new sketch in the Arduino IDE and coby the tempolate below over to your workspace.
#include <LiquidCrystal_I2C.h>

#define BUZZER_PIN 25   // GPIO for PWM buzzer
#define LCD_SCL_PIN 22  // GPIO for LCD SCL
#define LCD_SDA_PIN 21  // GPIO for LCD SDA
#define BUTTON_PIN 32   // GPIO for button

// game variables
LiquidCrystal_I2C lcd(0x27, 16, 2);  // lcd
int dinoRow = 1;                     // 0 = top row, 1 = bottom row
bool isDinoJumping = false;          // is the dino currently jumping?
const int jumpDuration = 750;        // duration of a jump (ms)
unsigned long lastJumpTime = 0;      // time at which the dino last jumped (ms)
int obstacleCol = 15;                // start at 15th coloumn
int moveInterval = 300;              // ms per move, controls the speed of the game
unsigned long lastMoveTime = 0;      // time at which the obstacle last moved (ms)

void end_game () {
  // put your code to indefinitely stall the game here

}

void buzzer_beep () {
  // put your buzzer beep code here

}

void check_jump_button () {
  // put your code to check the button state here

}

void update_dino_position () {
  // put your code to update the dino position here

}

void update_obstacle_position () {
  // put your code to update the obstacle position here

}

void check_dino_collision () {
  // put your code to check the dino collision here

}

void update_lcd () {
  // put your lcd display control code here

}

// this code will run once
void setup () {

  // initialize pinouts
  Wire.begin(SDA_PIN, SCL_PIN);
  pinMode(SOUND_PIN, OUTPUT); // PWM
  pinMode(BUTTON_PIN, INPUT_PULLUP);

  // initialize the display
  lcd.init();
  lcd.backlight();
  lcd.setCursor(0,0);
  lcd.print("ES@P T-rex Game");

  // game introduction beeps
  buzzer_beep();
  delay(50);
  buzzer_beep();
  delay(50);
  buzzer_beep();
  delay(500);

}

// the code is called repeatedly
void loop () {
  // put your main code here, to run repeatedly:

}
1. Defines
- BUZZER_PIN - defines what pin your buzzer is connected to (25)
- LCD_SCL_PIN - defines what pin your LCD SCL is connected to (22)
- LCD_SDA_PIN - defines what pin your LCD SDA is connected to (21)
- BUTTON_PIN - defines what pin your button is connected to (32)
2. Global Variables
- lcd - allows for control over the LCD
- dinoRow - represents the row where the dino currently exists; valid row values are either 0 or 1; initialized to 1
- isDinoJumping - a boolean representing if the dino is currently jumping or not; initialized to false
- jumpDuration - a constant variabe representing the duration of a jump; defaulted to 750ms
- lastJumpTime - records the last time when the dino jumped; initialized to 0ms
- obstacleCol - represents the coluumn where an obstacle currently exists; valid column values range from 0 to 15; initialized to 5
- moveInterval - represents the refresh rate for the game to run; lower values make the game run faster; initialized to 300ms
- lastMoveTime - records the last time when the obstacle position was updated; initialized to 0ms
3. Functions
- end_game() - when this function is called, the game should display some text to signify that the game has ended, the final user score, and then indefinitely stall the program execution until a reset. lcd.clear(), lcd.setCursor(), and lcd.print() may be useful here.
- buzzer_beep() - when this funciton is called, the buzzer should beep. The beep duration should be finite, but it's up to you! The analogWrite(), and delay() function may prove to be useful here.
- check_jump_button() - when this function is called, it should check if the jump button has been pressed, and update the isJumping and jumpStartTime variables. The digitalRead() and millis() functions may be useful here.
- update_dino_position() - this function should update the dino's position depending on if the dino is currently jumping or not, and reset the isDinoJumping variable accordingly.
- update_obstacle_position() - this function should update the obstacle positon as needed. millis() will be useful here.
- check_dino_collision() - this function should check if the dino as collided with an obstacle, and take the proper action necessary if required.
- update_lcd() - this function will be tasked with updating the LCD. It should display the dino, the obstacle, and the current score. lcd.clear(), lcd.setCursor(), lcd.print() and delay() may be useful here.
- setup() - this function is automatically called ONCE when the code is compiled. Starter code for the setup() function has been supplied for you, but feel free to change anything here.
- loop() - this function is automatically called REPEATEDLY when the code is compiled, after setup() has been called. You should call most of your other functions from here.
Some of the supplied functions will need to call others, some will need to be called from loop(), it is up to you to figure out what needs to be called from where. Feel free to create additional variables and/or functions as you see fit, it is encouraged! Use google as a resource to find out what certain functions do. This is a common practice that you'll need to utilize as an engineer in the workforce!
Task 4: Extra
If you finish early and want more of a challenge, try implementing the following additional features:
- Game speeds up as score increases
- Allow multiple objects onscreen at a time
- Allow for a more randomized placement of objects
- Keep track of the high score
- Create a more detailed dino and obstacle (catcus) character
Contributions
- Guide: Tom Concannon
- Project Design: Connor Powell